Vacuuming an aquarium removes trapped fish waste, uneaten food and other debris before it can foul the water. Done properly, it is an efficient way to clean the substrate during a partial water change while protecting fish, plants and the beneficial bacteria that support a stable tank.
The right approach depends on the aquarium’s size and, most importantly, what is on the bottom: gravel, sand, planted-tank soil or a layered substrate. This guide explains how to choose a gravel vacuum, start the siphon safely, clean each substrate type and avoid the common mistakes that create a mess or disturb the aquarium.
Table of Contents
- Why vacuum aquarium substrate?
- What you need before starting
- Choose the right aquarium gravel vacuum
- How to start an aquarium siphon safely
- How to vacuum gravel step by step
- How to clean sand without removing it
- How to vacuum capped soil and layered substrate
- Spot-cleaning algae, rocks and hardscape
- Can you vacuum a sponge filter?
- How to remove the siphon without spilling dirty water
- Refill the aquarium safely after vacuuming
- How often should you vacuum an aquarium?
- Common aquarium vacuuming mistakes to avoid
- Quick aquarium vacuuming checklist
- Frequently asked questions
- Key takeaway
Why vacuum aquarium substrate?
Debris naturally settles to the bottom of a fish tank. This includes food that was not eaten, fish waste and general organic material. As that material breaks down, it can contribute to ammonia and nitrate problems that may harm fish and destabilise water conditions.
Regular substrate cleaning also helps prevent compacted, low-oxygen areas from developing. When these pockets are disturbed by fish or while rearranging rocks and wood, they can release built-up waste into the water.
Aquarium vacuuming is not about making every grain of substrate spotless. The goal is to remove accumulated detritus while leaving the tank layout, plants and biological filtration as undisturbed as possible.
What you need before starting
- A gravel vacuum or siphon: Choose a size suited to the tank and substrate.
- A bucket: A second bucket is useful for larger water changes.
- Towels: Keep them nearby before water starts moving.
- Water conditioner: Use it when refilling with tap water.
- A remineraliser: Use one if refilling with RO water.
- An optional priming bulb: This starts the siphon without using your mouth.
Before putting the siphon into the water, unplug the heater and filter. This reduces electrical risk and prevents equipment from running when the water level drops.
Choose the right aquarium gravel vacuum
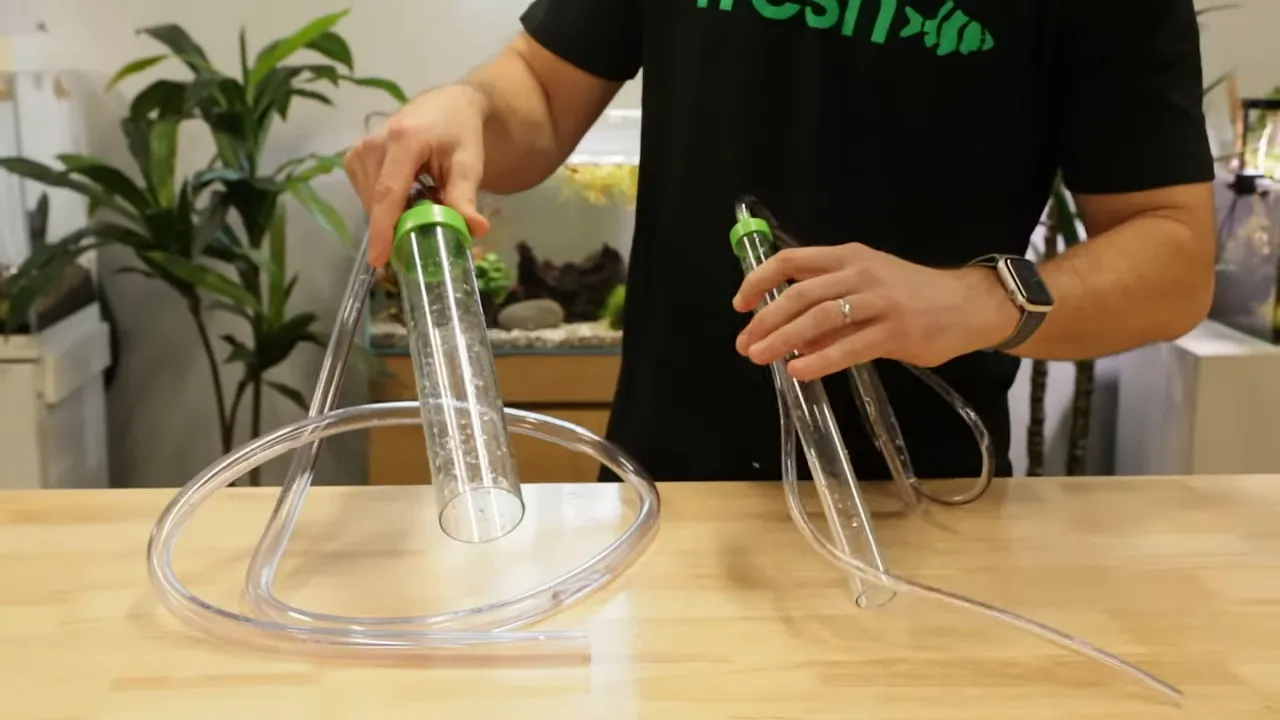
Gravel vacuums vary in hose diameter, tube width and tube length. Bigger is not automatically better. The best size gives you enough cleaning power without removing water faster than you can work.
Small tanks: use a narrow siphon
A smaller vacuum tube is easier to manoeuvre around plants, rocks and tight spaces. Its lower flow rate gives more time to clean before reaching the desired water-change volume. It also offers greater control around fine substrate and delicate aquascaping.
Large tanks: use a wider hose and tube
A larger aquarium has more ground to cover and usually more open space for the vacuum. A wider hose provides stronger flow and makes cleaning a broad gravel bed more efficient.
For a standard partial water change, a useful target is about 30% of the tank volume. The vacuum size should allow you to clean a practical amount of substrate before reaching that level.
How to start an aquarium siphon safely
A siphon needs water flow from the aquarium into a lower bucket. Avoid routinely placing your mouth directly on aquarium tubing, particularly after it has been used for cleaning.
Option 1: Start suction without touching the tube
Hold a closed fist near the end of the tube, leaving a small gap, and create suction without putting your mouth on the hose itself. Closely monitor the water as it travels through the line so it does not reach you unexpectedly.
Option 2: Fill and prime the tube in the aquarium
Submerge the tube until it fills with water. Lift it slowly so water begins to drain, then return the tube to the aquarium and angle it down towards the substrate. With practice, this can establish the siphon without mouth contact.
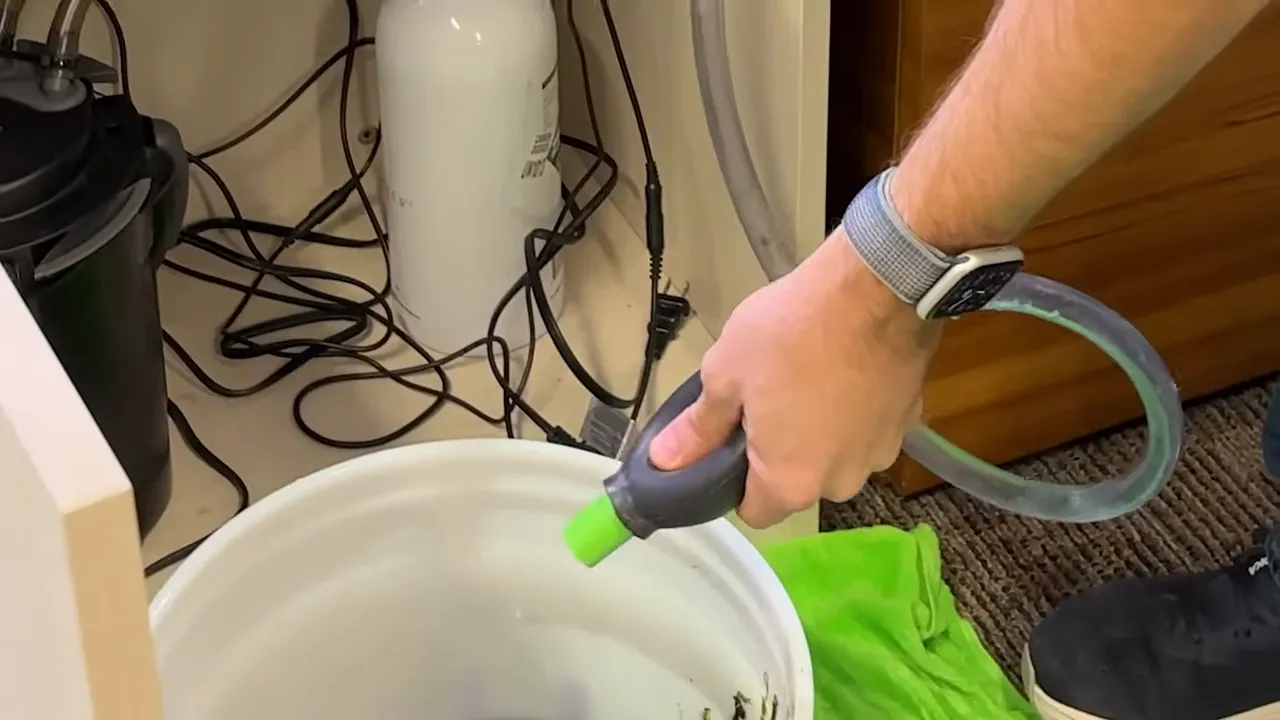
Option 3: Use a priming bulb
A priming bulb is the simplest option for many aquarists. Fit it to the siphon tubing and squeeze it a few times to begin the water flow.
How to vacuum gravel step by step
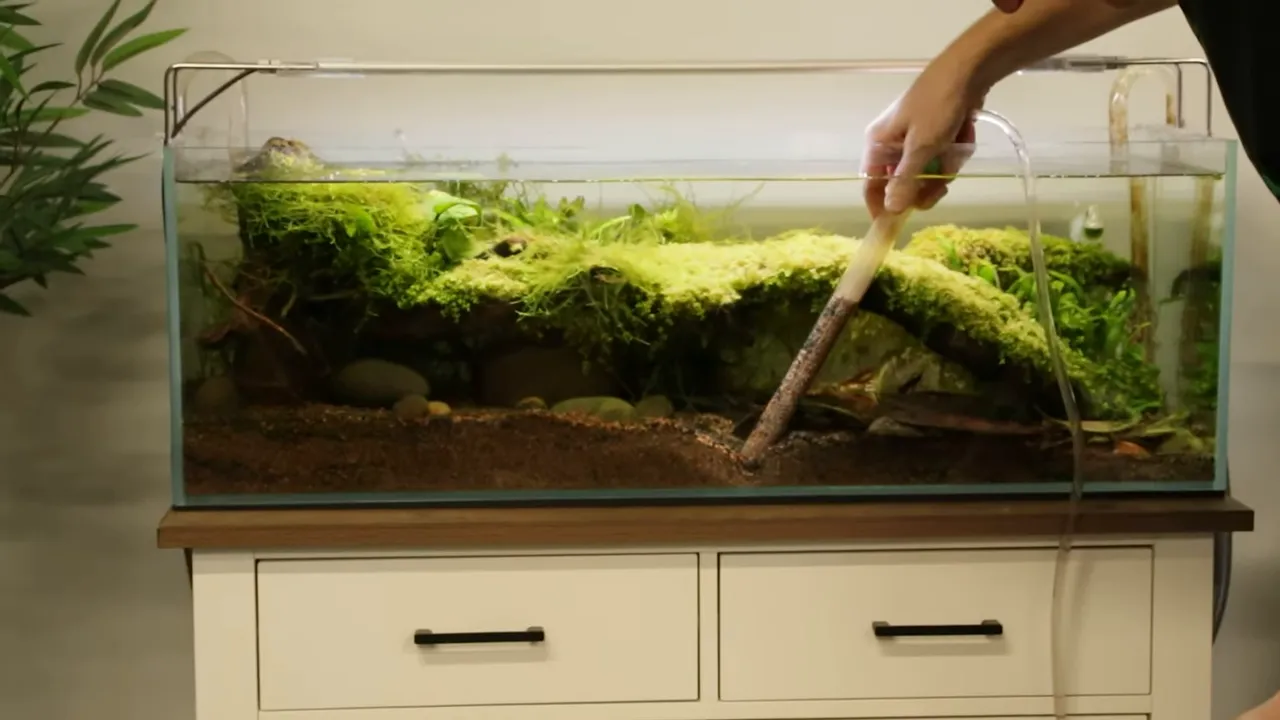
Once the siphon is flowing into the bucket, work methodically across the tank instead of moving randomly. This helps prevent missed areas and makes it easier to control how much water is removed.
- Lower the tube into the gravel. Push it into the substrate where waste tends to accumulate.
- Allow the gravel to lift and tumble. The heavier gravel should rise in the tube briefly and then fall back, while lighter debris is carried away.
- Move to the next section. Clean in a slow pattern across the accessible substrate.
- Focus on high-activity areas. Fish often spend more time in particular locations, and these spots may need a deeper clean.
- Watch the bucket and water level. Stop when the planned water-change volume has been removed.
If the tube clogs, or if you need to pause while gravel is inside the tube, pinch the hose. This stops the flow while allowing the material in the tube to fall back into the aquarium rather than into the bucket.
How to clean sand without removing it
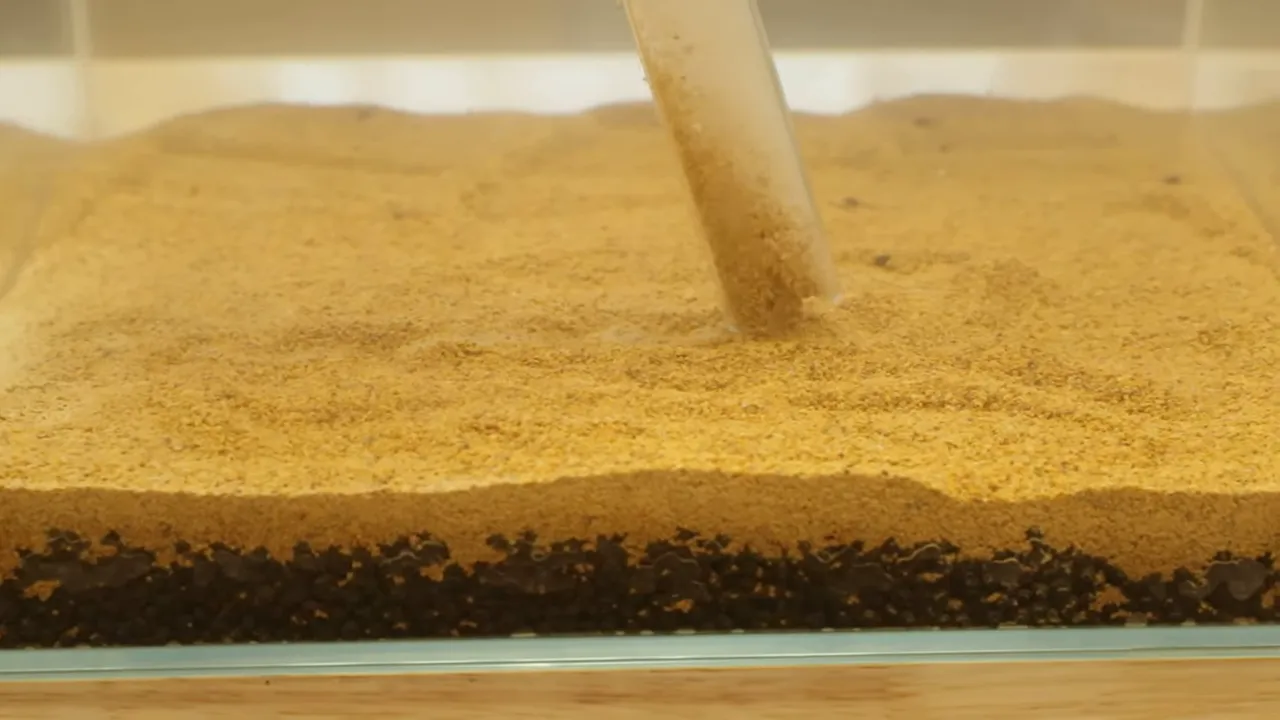
Sand needs a gentler technique than gravel. Fine grains can be pulled up quickly, so a large, powerful gravel vacuum can remove more substrate than intended.
Use a smaller siphon for better flow control and work near the surface. Keep the tube at an angle and drag it lightly over the sand rather than driving it deeply downward. This lifts detritus from the top layer while reducing the chance of removing large amounts of sand.
For isolated debris, algae or substrate that has spilled into another area, a bare length of tubing can provide more targeted suction. A narrow airline tube is especially useful in confined spots around rocks, wood and plants.
Use an angled tube tip for surface cleaning
Cutting a 45-degree tip on a small tube can make it easier to skim a very thin layer from the surface. This is useful when removing algae-covered sand while leaving most of the substrate in place.
If a small patch of sand is removed, tidy the area afterwards with a small amount of replacement sand.
How to vacuum capped soil and layered substrate
A capped substrate has a lower layer of soil covered by sand or another material. The main risk is breaking through the cap and drawing soil into the water, which can create a significant mess.
Use a smaller vacuum with lower flow. Keep the tube angled and skim the surface of the cap. Avoid plunging it straight down into the substrate, especially where the sand layer is shallow.
Spot-cleaning algae, rocks and hardscape
Standard gravel-vacuum tubes are excellent for broad cleaning, but they can be too large for precise jobs. For targeted suction, disconnect the wide vacuum tube and use the hose directly. The narrower opening creates stronger, more focused suction.
This approach can help with:
- Algae patches on the substrate
- Debris caught around rocks and driftwood
- Loose substrate in unwanted areas
- Small hard-to-reach sections of an aquascape
Work slowly around plants and hardscape. The objective is to remove visible waste, not to dismantle the layout or pull up plant roots.
Can you vacuum a sponge filter?
Yes. A sponge filter can be cleaned gently with the aquarium vacuum while performing the water change. This removes loose debris without rinsing the sponge under chlorinated tap water.
Chlorinated water can harm the beneficial bacteria living in the sponge. Vacuuming it in the tank is a practical way to remove accumulated debris while reducing that risk.
How to remove the siphon without spilling dirty water
Many aquarium-cleaning spills happen at the end of the job. Do not simply pull a running siphon straight out of the tank, because water remaining in the tube can drain back into the aquarium and stir up the area you just cleaned.
Use one of these methods instead:
- Tilt the vacuum upward: Raise the tube so the remaining water drains into the bucket before removing it.
- Cap the end with your hand: Cover the tube opening, then lift it out of the tank while keeping the water contained.
Keep the bucket stable and towels within reach until the tube is fully empty.
Refill the aquarium safely after vacuuming
Substrate vacuuming naturally removes aquarium water, making it a convenient time for a partial water change. Refill with properly prepared water.
- For tap water, use an appropriate water conditioner to dechlorinate it.
- For RO water, use a suitable remineraliser.
After refilling, restore the water level and reconnect the heater and filter.
How often should you vacuum an aquarium?
There is no single schedule that suits every tank. The right frequency depends on the tank size, stocking level and how much food is being added.
As a general maintenance practice, vacuuming during regular water changes keeps accumulated detritus under control. A heavily stocked aquarium or one with generous feeding may need attention more often than a lightly stocked tank.
Use the condition of the substrate as your guide. If visible waste is collecting, clean the affected sections. If the tank is relatively clean, avoid overworking the substrate simply to follow a rigid schedule.
Common aquarium vacuuming mistakes to avoid
Using too much suction in a small or delicate tank
A large vacuum can drain water too quickly and make it difficult to clean carefully around plants, fish and fine sand. Choose a smaller tube when control matters more than speed.
Vacuuming capped soil too deeply
Driving the tube into a sand cap can pull up the soil layer underneath. Keep the tube angled and work near the surface.
Rinsing sponge filters in chlorinated water
This can damage beneficial bacteria. Use aquarium water or vacuum the sponge gently in the tank instead.
Ignoring the areas where fish congregate
Waste is not distributed evenly. Pay attention to the spots fish use most often and give these areas extra attention.
Trying to clean every part of the tank at once
The water-change limit sets the available cleaning time. Work through the substrate systematically and prioritise visible debris or high-waste areas.
Removing the siphon carelessly
Water left in the hose can spill or cloud the tank again. Tilt the tube up or cap it before lifting it free.
Quick aquarium vacuuming checklist
- Unplug the heater and filter.
- Prepare the siphon, bucket, towels and replacement water supplies.
- Select a vacuum size suited to the aquarium and substrate.
- Start the siphon with a priming bulb or another controlled method.
- Clean gravel by lifting and tumbling it, or skim sand and capped substrate at an angle.
- Target high-waste areas and visible debris first.
- Stop at the intended partial water-change volume.
- Remove the siphon without letting the remaining tube water spill back.
- Refill with conditioned tap water or remineralised RO water.
- Reconnect the heater and filter.
Frequently asked questions
Should gravel go up the aquarium vacuum tube?
Yes, gravel may briefly lift into the tube during cleaning. In a properly sized gravel vacuum, the heavier gravel falls back down while lighter waste is carried out with the water.
Can you vacuum aquarium sand?
Yes. Use a smaller siphon with lower flow, hold it at an angle and skim the sand surface. This removes debris while reducing the amount of sand drawn into the tube.
Should you vacuum planted tank soil?
Use caution with planted-tank soil, especially if it is covered by sand. Clean surface debris with a small vacuum and avoid digging into the substrate or exposing the soil beneath the cap.
Is aquarium vacuuming part of a water change?
Yes. Because siphoning substrate removes tank water, it fits naturally into a partial water change. Replace the removed water with properly conditioned or remineralised water.
Why does my gravel vacuum remove water too fast?
The vacuum tube or hose may be too wide for the aquarium. A smaller siphon provides lower flow and more time to clean the substrate before the planned water volume has been removed.
Key takeaway
The best way to vacuum an aquarium is to match the tool and technique to the substrate. Tumble gravel to release trapped debris, skim sand gently, and keep a small siphon angled over capped soil. Combine cleaning with regular partial water changes, protect beneficial bacteria and work methodically rather than aggressively for a cleaner, more stable aquarium.