Adding pressurised CO2 to a planted aquarium can feel technical at first, but a complete CO2 kit makes the process far more approachable. A well-designed all-in-one setup provides the core equipment needed to deliver and monitor carbon dioxide: a filled cylinder, regulator, solenoid, airline tubing, bubble counter, diffuser, check valve and CO2 indicator.
This guide explains how to install and tune a planted aquarium CO2 system, how to use a drop checker correctly, and which setup mistakes to avoid. It is especially useful for smaller planted tanks where carpeting plants and dense growth benefit from stable CO2 delivery.
Table of Contents
- What a complete aquarium CO2 kit should include
- Set up the cylinder, stand and regulator
- Install and prepare the CO2 monitoring equipment
- Route the tubing and position the diffuser
- Start CO2 flow and adjust it gradually
- Run aquarium CO2 on a timer
- Common aquarium CO2 setup mistakes
- Quick planted aquarium CO2 setup checklist
- Final takeaway
- Frequently asked questions
What a complete aquarium CO2 kit should include
A complete kit reduces the need to match separate fittings and components. Before starting, lay out the parts and check the instructions supplied with the system. A typical all-in-one aquarium CO2 kit includes the following.
- Pre-filled CO2 cylinder: The gas source for the aquarium.
- Cylinder stand: Keeps the cylinder upright and stable.
- Regulator: Attaches to the cylinder and controls pressure.
- Solenoid: Allows the CO2 supply to switch on and off electrically.
- Pressure gauge: Shows cylinder pressure.
- CO2 tubing: Connects the regulator to the aquarium equipment.
- Check valve: Helps stop aquarium water travelling back toward the regulator and solenoid.
- Bubble counter: Gives a visible way to judge CO2 flow rate.
- Diffuser: Breaks CO2 into small bubbles for delivery into the water.
- Drop checker and indicator solution: Provides a colour-based indication of CO2 level.
- Tubing holder: Routes airline neatly over the aquarium rim.
Replacement cylinders and replaceable diffuser or bubble-counter components make a setup easier to maintain over time. The main advantage is simplicity: the essential parts are selected to work together rather than assembled individually.
Set up the cylinder, stand and regulator
1. Assemble the cylinder stand first
Build the stand before attaching the regulator so the cylinder has a stable place to sit. Position the support pieces in the orientation intended by the kit, leaving enough clearance for the cylinder to fit without striking the stand.
Place the CO2 cylinder upright in the completed stand. Remove any packaging ring or seal that prevents the regulator from seating correctly.
2. Attach the regulator to the cylinder
Thread the regulator onto the cylinder connection by hand. Tighten it until the threads are fully engaged and it is secure. Avoid overtightening the connection with unnecessary force.
The regulator is the control centre of the system. It receives gas from the cylinder, shows pressure on its gauge, supplies the tubing connection and uses the solenoid to control when CO2 flows.
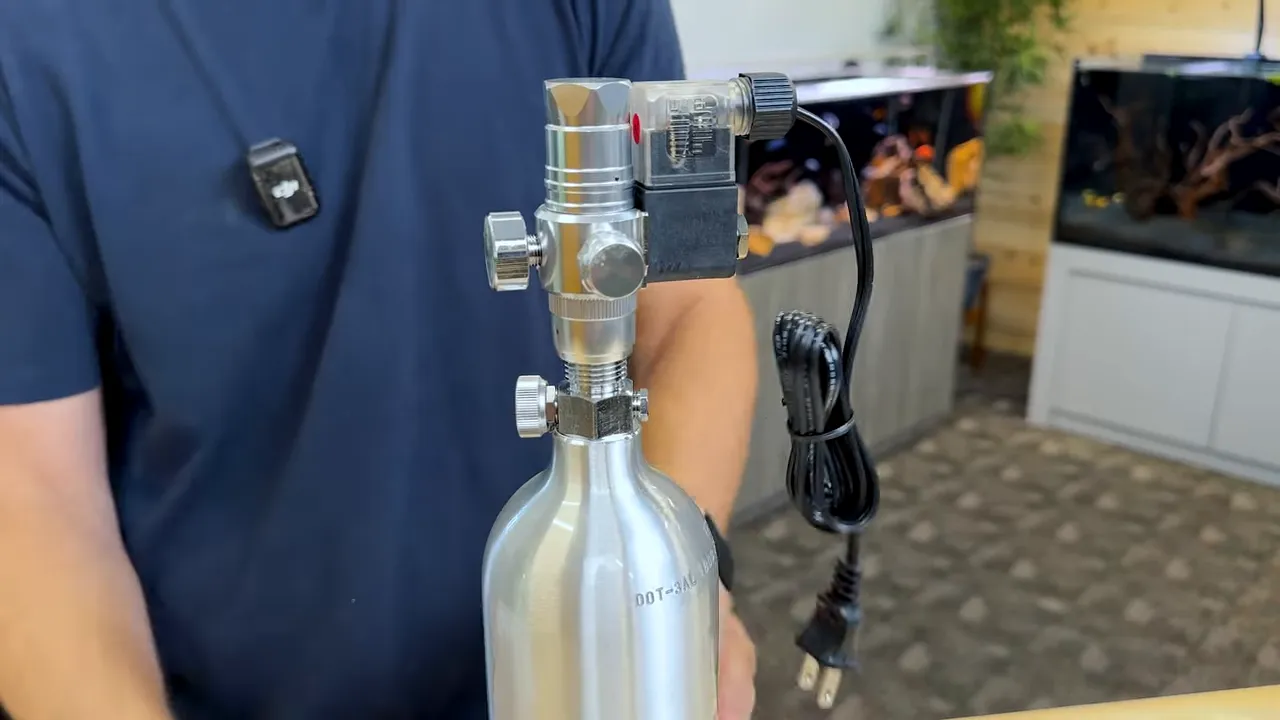
3. Connect the CO2 tubing securely
Detach the small fitting at the regulator outlet, slide the fitting over the CO2 tubing, then push the tubing fully onto the regulator connection. Refit and tighten the fitting so the tubing is held securely.
A loose tubing connection can allow gas to escape, so check that the tubing is seated properly before moving on.
Install and prepare the CO2 monitoring equipment
Prepare the drop checker
The drop checker is the small indicator that sits inside the aquarium. Add the supplied indicator solution carefully, without overfilling it. The solution begins blue and needs time to respond after it is placed in the tank.
Mount the drop checker on the inside glass where it is easy to inspect. Do not expect an immediate colour change. Allow at least several hours, and potentially up to a day, for the reading to settle before making decisions about the CO2 flow.
Use the colour as the adjustment guide:
- Green: The target indication for this setup.
- Yellow: CO2 is too high, so reduce the flow.
- Blue at initial setup: The indicator solution’s starting colour. Allow time for it to stabilise in the aquarium.
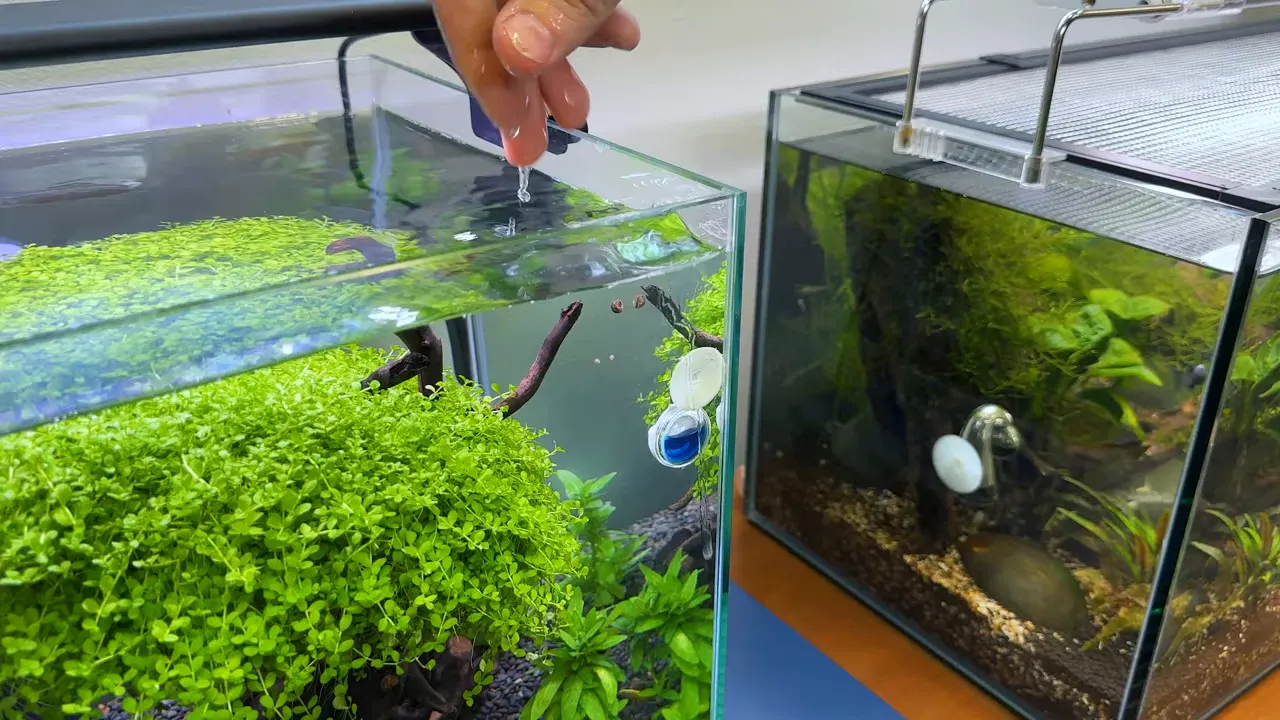
Fill the bubble counter and prepare the diffuser
A combined bubble counter, check valve and diffuser is a compact way to manage the delivery end of the CO2 line. Before installation, remove its top and diffuser plate, then fill the bubble-counter chamber with aquarium water.
The diffuser plate is what turns gas into smaller bubbles. Once it has soaked, the bubbles should become finer than they appear at first startup.
The bubble counter gives a practical starting point for adjustments because it shows the rate of bubbles travelling through the system. A starting flow around one to two bubbles per second is appropriate for the aquarium setup demonstrated, but the drop checker should determine whether that rate needs adjustment.
Route the tubing and position the diffuser
Plan the tubing route before cutting it. A tidy route makes the installation less obtrusive and avoids unnecessary bends or loose loops.
Use a tubing holder over the aquarium rim
Clip the tubing holder over the back of the aquarium and press the tubing into its retaining teeth. This keeps the line running cleanly over the glass instead of bowing outward from the tank.
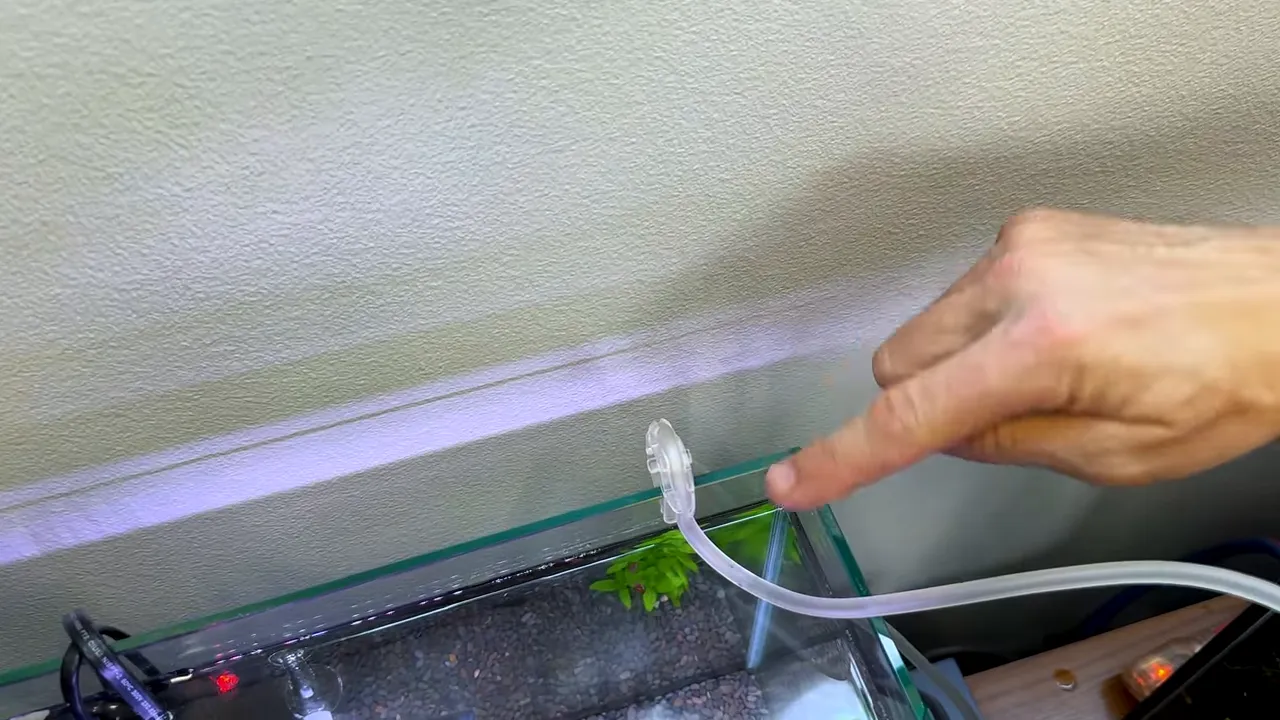
Set the diffuser depth
Cut the tubing so the diffuser sits roughly two to three inches above the aquarium bottom. This gives the bubbles more travel time in the water before reaching the surface.
Attach the tubing to the diffuser assembly and secure the unit to the aquarium side wall. Keep it in a position that is discreet but still accessible for cleaning, inspection and adjustments.
Start CO2 flow and adjust it gradually
With all connections in place, plug in the solenoid. A light and a small click indicate that the solenoid has powered on. Then open the cylinder valve to supply pressure to the regulator.
Gas may not appear at the diffuser immediately because the tubing needs to fill. Open the flow control enough to begin the process, wait for gas to reach the diffuser, then reduce the output substantially once bubbles begin.
Initial bubble size can be larger while the diffuser is dry. As it soaks, the diffuser should produce smaller, finer bubbles.
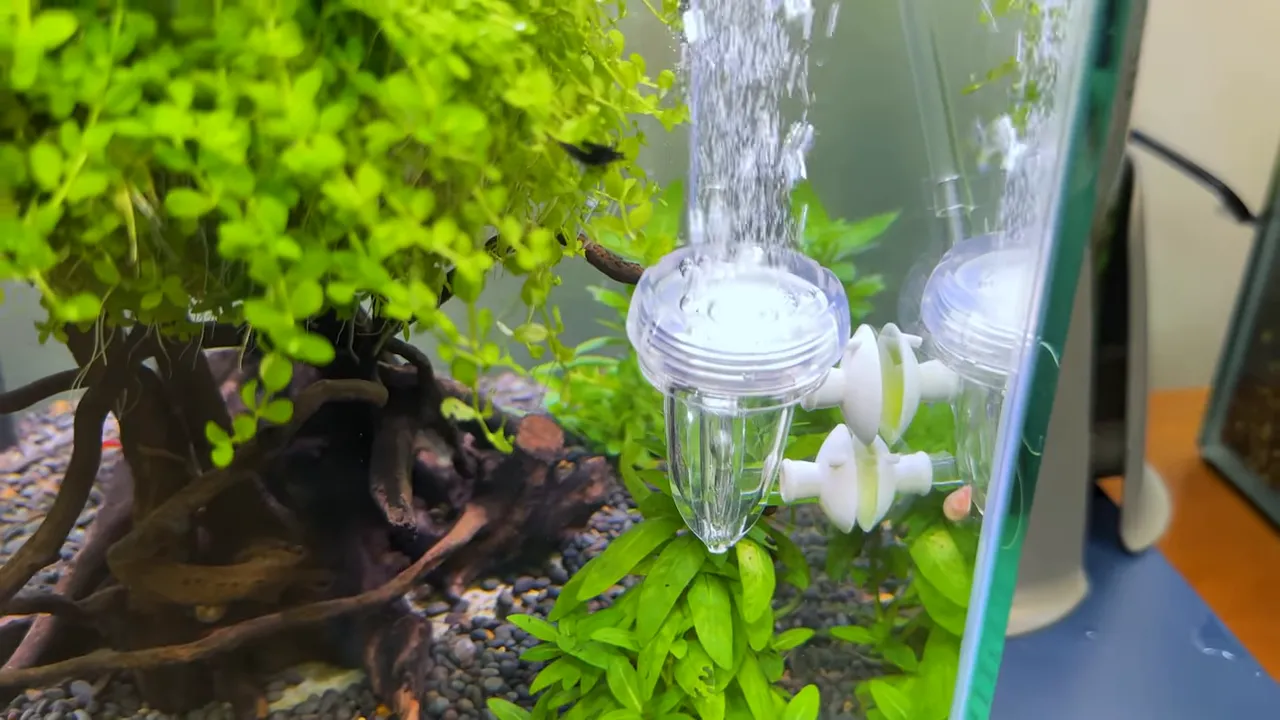
Use the drop checker, not guesswork
Do not keep turning the regulator knob based only on the bubble count. The bubble counter shows flow, but the drop checker gives the feedback needed to decide whether to increase or decrease that flow.
After allowing the indicator adequate time to respond:
- Reduce the CO2 flow if the indicator turns yellow.
- Leave the setting alone once the indicator is green.
- Make small changes rather than repeatedly making large adjustments.
- Give the drop checker time to settle after each adjustment.
Run aquarium CO2 on a timer
The solenoid should be connected to a timer rather than plugged directly into a wall outlet. CO2 does not need to run continuously.
Set the timer to turn CO2 on about one hour before the aquarium light turns on. Turn CO2 off when the aquarium light turns off. This schedule aligns CO2 delivery with the period when aquarium plants are using light for photosynthesis.
A basic plug-in timer is sufficient for this purpose. The key is consistency: use the same daily light and CO2 schedule rather than manually switching the system on and off.
Common aquarium CO2 setup mistakes
Expecting an instant drop-checker reading
The indicator does not react immediately. Checking it moments after installation can lead to unnecessary adjustments. Give it several hours, or as much as a day, before interpreting the result.
Starting with too much flow
When filling a new CO2 line, it can be necessary to open the control more than usual briefly. Once gas reaches the diffuser, reduce it. The final setting may feel as though the control is barely open.
Ignoring a yellow drop checker
Yellow is the signal that the CO2 amount is too high in this system. Turn the flow down and allow time for the indicator to respond.
Leaving CO2 on around the clock
Continuous CO2 operation is unnecessary for this setup. Use the solenoid and timer so CO2 begins before the lights and stops when the lights go off.
Cutting the diffuser line too short
A diffuser positioned too high gives bubbles less time to travel through the aquarium water. Leave enough tubing for it to sit two to three inches above the bottom.
Skipping the check valve
The check valve is an important protective component. It helps prevent water from moving back through the tubing toward the solenoid and regulator.
Quick planted aquarium CO2 setup checklist
- Build the cylinder stand and place the cylinder upright.
- Attach the regulator securely by hand.
- Connect and tighten the CO2 tubing at the regulator.
- Fill and install the drop checker with indicator solution.
- Fill the bubble counter with aquarium water.
- Install the diffuser plate and mount the diffuser.
- Route the tubing over the tank using a rim clip.
- Position the diffuser two to three inches above the aquarium bottom.
- Plug the solenoid into a timer.
- Open the cylinder valve and begin low-flow adjustment.
- Wait for the drop checker to settle before changing the flow.
- Maintain a green drop-checker indication and reduce flow if it turns yellow.
Final takeaway
An aquarium CO2 kit is easiest to manage when each component has a clear role: the cylinder stores gas, the regulator controls it, the solenoid schedules it, the bubble counter makes flow visible, the diffuser delivers it and the drop checker guides final adjustments.
Start slowly, give the indicator time to respond, and use a timer from the beginning. Those few habits make a planted aquarium CO2 setup more consistent, cleaner and much less intimidating.
Frequently asked questions
How long does it take for an aquarium CO2 drop checker to change colour?
A drop checker can take a couple of hours or longer to settle. Allow at least half a day, and potentially up to a day, before relying on the colour to adjust CO2 flow.
What colour should a CO2 drop checker be?
For this setup, green indicates the desired CO2 level. Yellow means there is too much CO2 and the flow should be reduced.
Where should a CO2 diffuser go in an aquarium?
Position the diffuser on the aquarium side wall around two to three inches above the bottom. This gives bubbles more time to travel through the water.
How many CO2 bubbles per second should I start with?
A practical starting point for the demonstrated aquarium is around one to two bubbles per second. Use the drop checker after it has settled to decide whether the flow should be changed.
Should aquarium CO2 run at night?
No. Use a timer to switch CO2 on about an hour before the aquarium lights turn on and switch it off when the lights turn off.